Showing posts with label fruit. Show all posts
Sunday, May 27, 2012
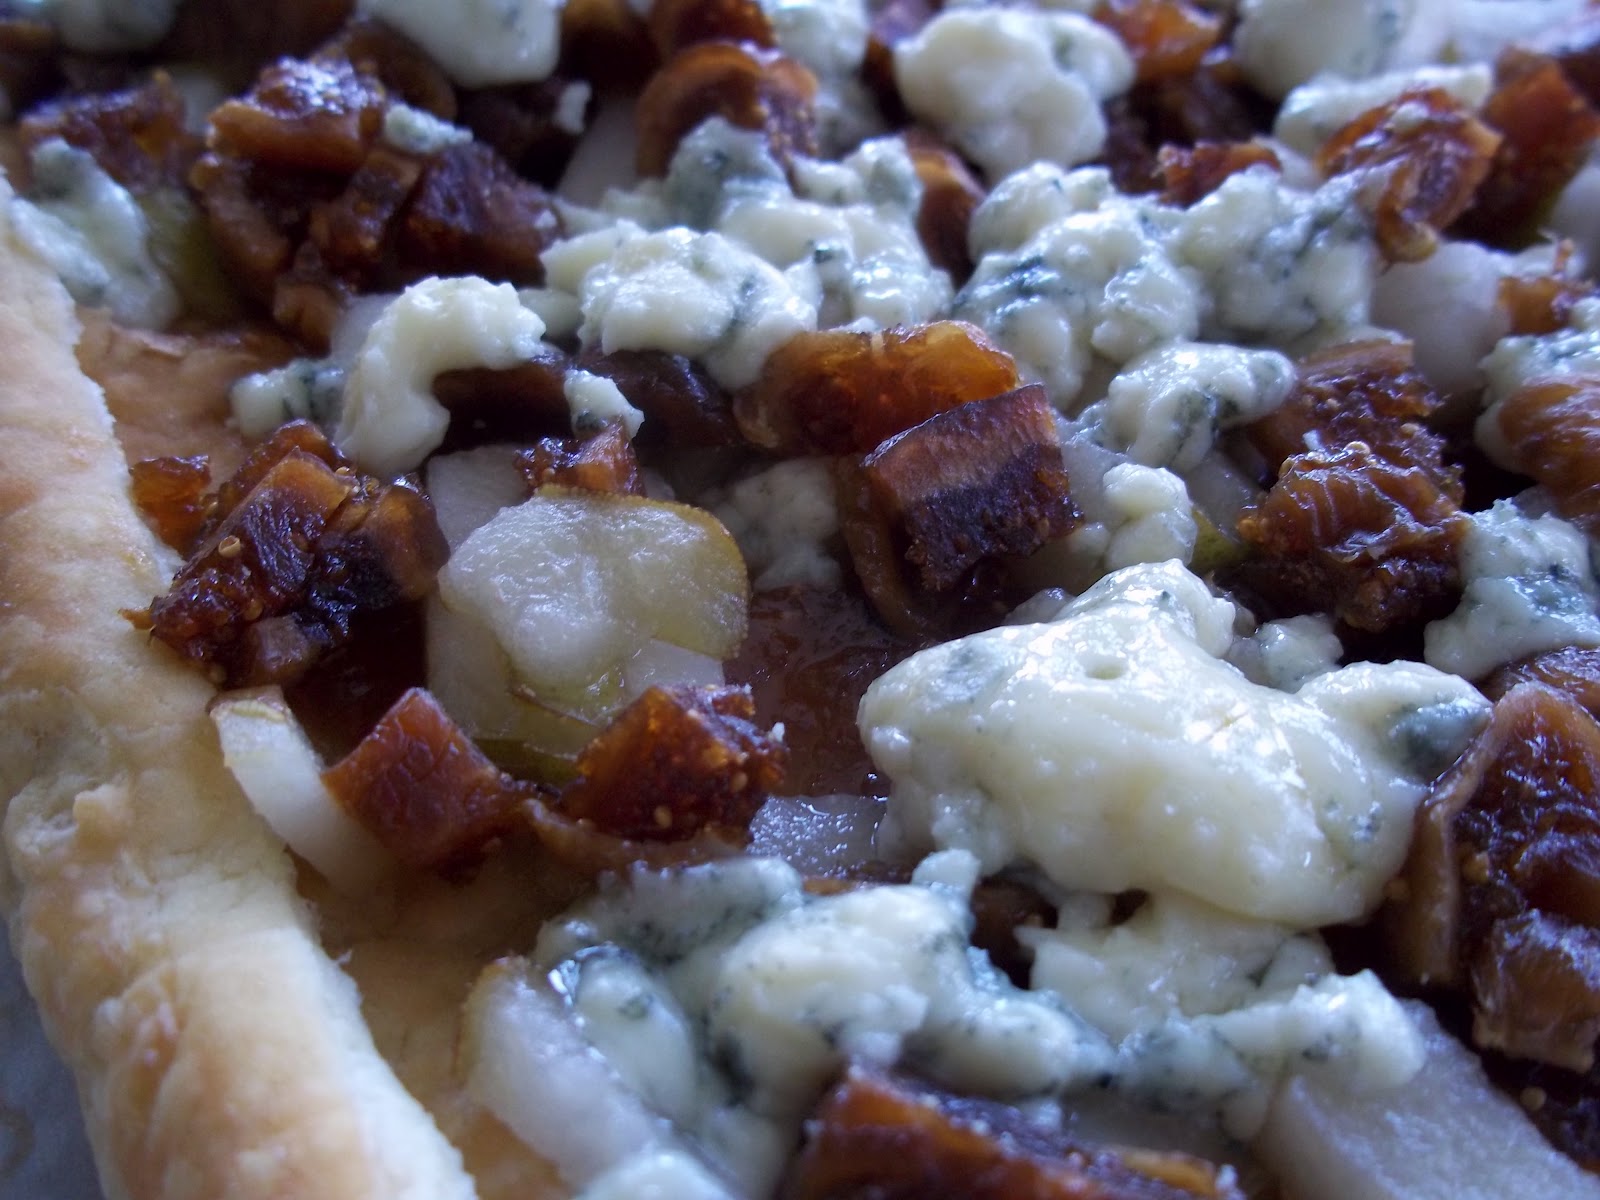
Fig, Pear and Blue Cheese Tart
Got Merlot? Yes. Then have I got the appetizing small plate tart for you! Fig, Pear and Blue Cheese pair up so well together to create a contrasting flavor explosion in your mouth. I'm not sure why I am so hyped about Blue Cheese lately, but here is another deliciously easy treat.
What? No Merlot? That's perfectly fine this pairs well with any sparkling beverage, something that has an effervescence to help cleanse the pallet in between bites.
By the way, although the photo shows a fork, I didn't use it to gobble this tart up. The crispy puff pastry was sturdy enough to lift each piece without flopping the toppings into my lap.
Okay let's get started. Here's what you'll need:
Preheat the oven to 400 degrees
1 frozen puff party sheet thawed, follow box instructions for thawing
1 small Pear cored and diced
1/2 C Figs chopped
1/4 C Blue Cheese, crumbled
3T Fig preserves
Chop the Figs and Pear and crumble the Blue Cheese and set aside.
Carefully unfold your puff pastry and place it on a baking sheet. I lined mine with parchment paper, but if your pan is non-stick there really is no need to do that. Next take a butter knife and score the pasty about one inch in from the edge to create a frame. Don't cut clean through the party though you don't want it to detach.
Next, take a fork and pierce the entire surface inside the framed you just created. Now bake in the oven on 400 degrees for 10 minutes. Remove from oven. You have to pre-bake the pasty otherwise you'll have a uncooked doughy bottom and that would be just plain gross.
Staying inside the lines spread a generous layer of preserves onto the baked pastry
Now simply sprinkle your Fig, Pear and Blue Cheese on top. Be sure every bite gets a little bit of all the ingredients.
Time to toss it back into the oven, again on 400 degrees for 10-15 more minutes.
When done remove from the oven. Place your Fig, Pear and Blue Cheese tart on a serving tray and allow to cool slightly. Then cut into slices. I cut mine into nine equal squares using a pizza wheel.
Yummy!
Labels:
appetizers,
blue cheese,
figs,
fruit,
gourmet,
pear,
preserves,
puff pastry,
recipes,
small plate,
tapas,
tart
Saturday, April 28, 2012
Orange Mango Carrot Popsicles
![]() |
| Orange Mango Carrot Popsicles |
The trick to a good popsicle is to not add water. So don't try to take a short cut by using store bought orange juice of any kind.
Here's what I used:
2/3 C Carrot juice (1lb bag)
1- 4lb Bag of Navel Oranges juiced
2 Mangoes
1/2 C Light Agave Nectar (optional)
Listen, these measurements are really by preference. You add as much or as little of each as you feel you'd like. The first batch of these I made the family wasn't too keen on the carrot flavor. Well that's not completely accurate, my niece Audrey who can't stand veggies loved these Popsicle and she knew there was carrot in them. My sister wanted them to be even sweeter even though the carrots and mangoes are very sweet hence the addition of the agave nectar. So, it really does depend on your own personal pallet.
I love these Groovy Popsicle molds from Tovolo. They're big and the grooves make them fun! Plus the handle has a little cup that catches the drips. Wash and dry your molds and secure them in their stand.
Wash carrots and run them through the juicer. I love my Jack LaLanne Power Juicer because it runs so quietly and the motor doesn't get bogged down when I add the fruit/vegetables. Plus clean up truly is a breeze and it is not all that expensive.
Juice.....
Juice some more!
Juice the oranges. I'm thinking about ordering an electric orange juicer from Amazon.com. What do you think? Do you have one? How often do you use it? I think I would drink more fresh orange juice if I had one.
Juice....
Juice the oranges. I'm thinking about ordering an electric orange juicer from Amazon.com. What do you think? Do you have one? How often do you use it? I think I would drink more fresh orange juice if I had one.
This recipe was originally going to be just orange and carrot, but I found these gorgeously ripened mangoes in the fruit bowl so I may as well throw them in! Select the ripest mangoes you can find they should have an even dark pinkish color on both sides and be soft to the touch but not mushy. Wash them and dry them with a clean towel.
Using a sharp knife very carefully cut around the large stone inside by cutting straight down both sides of the mango.
Score the mango slices in a crisscross pattern then flip the slices inside out. Simply cut the square sections off and place in the blender.
Once you have the mango cubes in the blender add Orange juice, Carrot Juice and agave nectar. Blend until smooth. This should be enough liquid to fill at least a dozen standard size Popsicle molds, if not add a bit more orange juice.
If you are using agave now would be the time to add it. Start with 1/2 C then add more if desired.
Fill your molds and freeze for at least 4 hours. Be sure to leave a 1/4-1/2 inch of head space room at the top of each mold. This is going to be one Yummy Summer!!!
![]() |
| Orange Mango and Carrot Popsicles |
I used these products for this recipe and encourage you to do the same. (P.S. The Juiceman is on my wishlist. ;) )
, , , ,
What are some of your favorite fruit/veggie sweet treat combinations? Let me know in the comments!
Saturday, March 3, 2012
You are what you eat
I love this image! It's a good reminder that we are what we eat, and it truly does show on our face whether we are eating well or no.
I'm going to start looking into and practicing more "clean eating" as well as introducing some "raw foods". Nothing drastic just something to change things up a bit.
Doesn't Almond Buttered Banana & Açaí
sound yummy. Keep an eye out for that coming soon!
Hey do me favor, and follow me on Facebook, Twitter and Subscribe to my RSS feed. Oh and I'm on Pinterest too.
Sunday, February 5, 2012
Top 20 Super Foods
With all things great there has to be a solid foundation, otherwise what is created will crumble before long.
In order to continue to bring you uniquely deliciously and healthy snacks I needs a base from which to work. I stumbled upon this fantastic list of the Top 20 Super-Foods, from which I can begin creating and cooking my own recipes. These super-foods are a nutritional road-map of ingredients if you will.
First let's discuss what a super-food is:
Examples of these "well verified" superfoods would be:
As you can see from the list we have quite a foundation to work with! We already consume most; if not all, of these in our daily diets. So, for some of us the next step would be to bite-the-bullet on the expense and upgrade to 100% Organic. Which is a whole other topic of discussion!
Resources: [1],[2], Image:HealthCastle.com
In order to continue to bring you uniquely deliciously and healthy snacks I needs a base from which to work. I stumbled upon this fantastic list of the Top 20 Super-Foods, from which I can begin creating and cooking my own recipes. These super-foods are a nutritional road-map of ingredients if you will.
First let's discuss what a super-food is:
a common definition is that a superfood is one which has high concentrations of essential nutrients with proven health benefits, with few properties generally considered to be negative (such as being high in saturated fats or artificial ingredients, food additives or contaminants). An often-cited example of a superfood (or superfruit) is blueberries. They contain high concentrations of various antioxidants, anthocyanins, vitamin C, manganese, and dietary fiber, they have a compound, pterostilbene, which acts to protect the heart in the same way as cholesterol-lowering drugs, are low in calories and are most often organically grown.[1]
With all that said, not all claims of a food being super are true or even recognized by the scientific community! The term SuperFood has become a marketing tool and the name simply slapped on a label. You'll have to use caution and know what foods are actually verified as a superfood.
Examples of these "well verified" superfoods would be:
Berries, nuts and seeds in general, dark green leafy & flower vegetables (such as kale, collard greens, Swiss chard, brussel sprouts and broccoli), apples, citrus fruits, fatty fish such as salmon, mackerel and sardines, vegetables with bright, dark or intense colors (such as beets and their greens, and sweet potatoes), many legumes (peanuts, lentils, beans (with some beans being significantly higher in certain nutrients than others)), and whole grains as a group (gluten and other allergies notwithstanding). Dark (ie, over 70% pure) chocolate is also included in many superfood lists, although many of its claimed merits are still the subject of heated debate in scientific circles.[2]
Top 20 Superfoods:
- Beans & Lentils
- Black Rice
- Blueberries
- Cherries
- Coffee
- Concord Grapes
- Dark Chocolate
- Dried Plums
- Eddamame
- Figs
- Green Tea
- Kale
- Kiwi
- Mushrooms
- Quinoa
- Salmon
- Squash
- Strawberries
- Sunflower Seeds
- Walnuts
As you can see from the list we have quite a foundation to work with! We already consume most; if not all, of these in our daily diets. So, for some of us the next step would be to bite-the-bullet on the expense and upgrade to 100% Organic. Which is a whole other topic of discussion!
So, what do you think? Are you eating enough of these superfoods?
Resources: [1],[2], Image:HealthCastle.com
Thursday, January 26, 2012
Crispy Baked Apple Chips
These Crispy Baked Apple Chips have been my saving grace, particularly when I am craving a dessert like apple pie or something crunchy to munch on.
This is such a fun way to eat a serving of fruit! Granted you could just eat the apple and be done with it (LOL). Where's the fun in that? Or you could simply buy these from the store already prepared and packaged, but then you have more than you should have for one sitting (I for one am not done with a bag of chips until I've reach the bottom of the bag), and who knows what additives are in the store bought ones.
Besides Crispy Baked Apple Chips are super easy to make, here's how:
Preheat oven to 225 degrees
Ingredients:
Utinsels:
Make an acidulated water bath for your apple slices by filling the bowl with water and the juice of half a lemon. I float a slice of lemon in mine just for ha has.
Wash and dry apple. Using great care slice apple into paper thin slices, the thinner the better. Don't worry about the core it bakes up crispy too, and the seeds will fall out as you slice. When your slices build up drop them into the bowl of acidulated water. This process will keep the apple slices from browning from air exposure.
Remove the slices from the water bath and place in a single layer on paper towels. Pat them try thoroughly and transfer them to the cookie sheet.
Mix together the Splenda and Cinnamon in a small bowl and sprinkle it evenly over your chips.
The cookie sheet should be non-stick and very clean. If your sheet has some wear or is not non-stick then you will want to use the silpat sheet otherwise your crisps will stick.
Place the sheets in the center of the oven using both shelves. Bake at 225 for 30-40 minutes. Check for crispness at 30 minutes, lift the crisp from the sheet and turn them over, return to the oven for another five-ten minutes then remove, they will crisp up more once removed from the oven. The cook time really depends on how thin you are able to get your slices.
Once crispy remove from the sheet and serve. One apple equals one serving so the thinner you slice it the more chips you get and the crunchier they'll be.
Tips:
This is such a fun way to eat a serving of fruit! Granted you could just eat the apple and be done with it (LOL). Where's the fun in that? Or you could simply buy these from the store already prepared and packaged, but then you have more than you should have for one sitting (I for one am not done with a bag of chips until I've reach the bottom of the bag), and who knows what additives are in the store bought ones.
Besides Crispy Baked Apple Chips are super easy to make, here's how:
Preheat oven to 225 degrees
Ingredients:
- 1 medium (baseball sized Organic apple (Gala, Honey Crisp and Fuji are what I used)
- Juice from 1/2 Lemon
- 3 C cold water
- 1/4 tsp Cinnamon
- 1/2 tsp Splenda
Utinsels:- 2-Large Non-stick Cookie Sheets
- Large bowl
- Mandoline slicer or a sharp knife
- Paper towels or clean dish clothes
- Silpat sheets (optional)
Make an acidulated water bath for your apple slices by filling the bowl with water and the juice of half a lemon. I float a slice of lemon in mine just for ha has.
Wash and dry apple. Using great care slice apple into paper thin slices, the thinner the better. Don't worry about the core it bakes up crispy too, and the seeds will fall out as you slice. When your slices build up drop them into the bowl of acidulated water. This process will keep the apple slices from browning from air exposure.
Remove the slices from the water bath and place in a single layer on paper towels. Pat them try thoroughly and transfer them to the cookie sheet.
Mix together the Splenda and Cinnamon in a small bowl and sprinkle it evenly over your chips.
Apples are low in calories and uber nutritious!
Place the sheets in the center of the oven using both shelves. Bake at 225 for 30-40 minutes. Check for crispness at 30 minutes, lift the crisp from the sheet and turn them over, return to the oven for another five-ten minutes then remove, they will crisp up more once removed from the oven. The cook time really depends on how thin you are able to get your slices.
Once crispy remove from the sheet and serve. One apple equals one serving so the thinner you slice it the more chips you get and the crunchier they'll be.
Tips:
- Use organic apples
- This works really well with the peel only as well.
- Store in a ziploc bag at room temperature ( as if there will be any leftovers)
Enjoy your homemade Crispy Baked Apple Chips!
Subscribe to:
Posts (Atom)
Follow me on Facebook, Twitter and Subscribe to my RSS feed. Oh and I'm on Pinterest too.
Thanks!
Deborah :D
Thanks!
Deborah :D